HOW TO INSTALL LIGHTROOM PRESETS
(written by Mikko Lagerstedt)
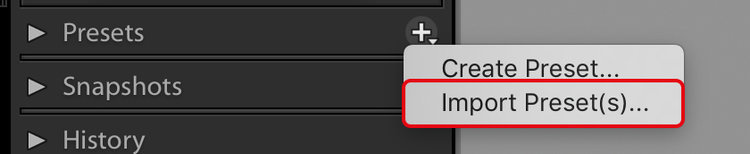
FOR LIGHTROOM CC 2018
You can now install Lightroom presets straight from the plus sign under the Presets dialogue when you are in the Develop Module in Lightroom.
HOW TO INSTALL LIGHTROOM 4, 5, 6 & CC 2017 PRESETS FOR WINDOWS
- Open Lightroom
- Go to: Edit • Preferences • Presets
- Click on the box titled: Show Lightroom Presets Folder
- Double click on Lightroom
- Double click on Develop Presets
- Copy the folder (s) of your presets into the Develop Presets folder
- Restart Lightroom
HOW TO INSTALL LIGHTROOM 4, 5, 6 & CC 2017 PRESETS FOR MAC
- Open Lightroom
- Go to: Lightroom (Dialogue) • Preferences • Presets
- Click on the box titled: Show Lightroom Presets Folder
- Double click on Lightroom
- Double click on Develop Presets
- Copy the folder (s) of your presets into Develop Presets folder
- Restart Lightroom
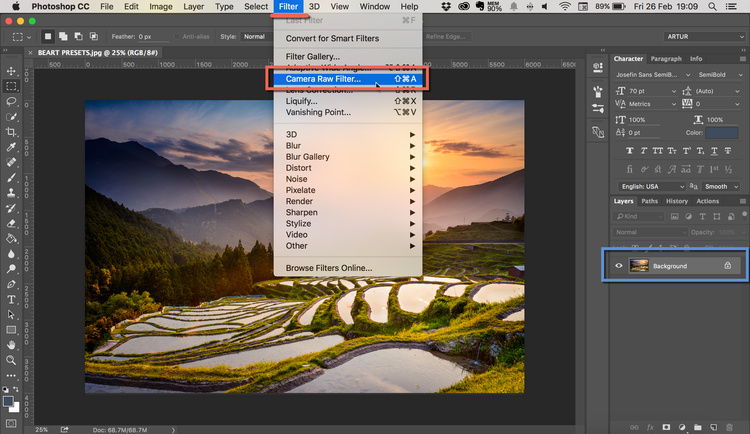
HOW TO INSTALL CAMERA RAW PRESETS (MAC & PC)
- To install Camera RAW Presets in Photoshop, please download and unzip the presets and place them in the following location:
- Mac(user)/Library/Application Support/Adobe/Camera Raw /Settings
- Windows(user)/Application Data/Adobe/Camera Raw/Settings or C: Users-[user name]/AppData/Roaming/Adobe/CameraRaw/Settings
- Make sure you only copy the preset files (.xmp) into the 'Settings' folder.
- Run Camera RAW or just open any RAW photo in Adobe Photoshop, click on the right side of basic menu (Presets), find my preset in the group «Skullova Presets» or «User Presets».
HOW TO INSTALL PRESETS IN THE FREE LIGHTROOM MOBILE APP
(written by Gayle Vehar)
Step 1: Download the DNG files to your phone.
Step 2: Open the Lightroom Mobile CC App
This step is really easy. Just open your free Lightroom app. Once its open, you can add the DNG/Preset files (next step).
Step 3: Add the DNG/Preset Files
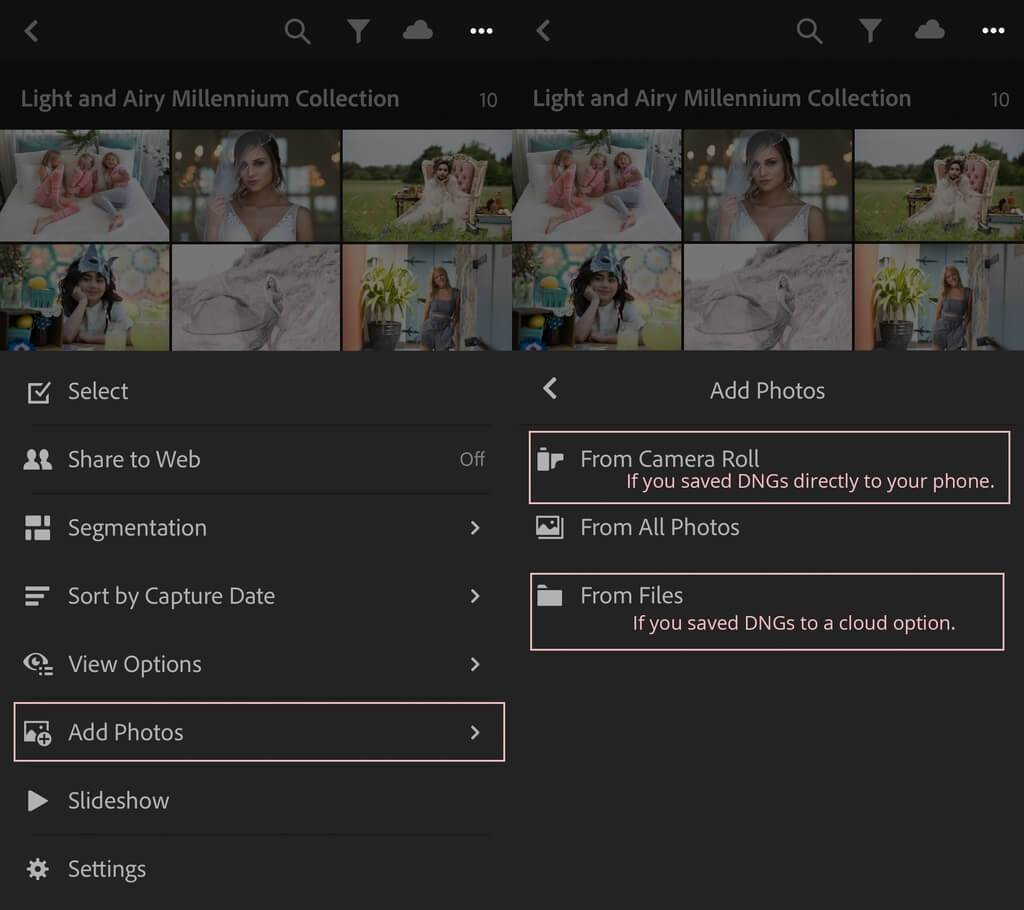
To add a preset, click on the (…) Settings option in the top-right corner of the app.
Choose the Add Photos option.
On the next screen, choose the location you will be pulling your DNG/Preset files from. If you have saved them to your phone, choose «From Camera Roll». If you have saved them to a cloud storage option, choose «From Files».
Select the DNG/Preset files you would like to import. This step may be a little different depending on your mobile phone, however most phones offer a way to select multiple files/images.
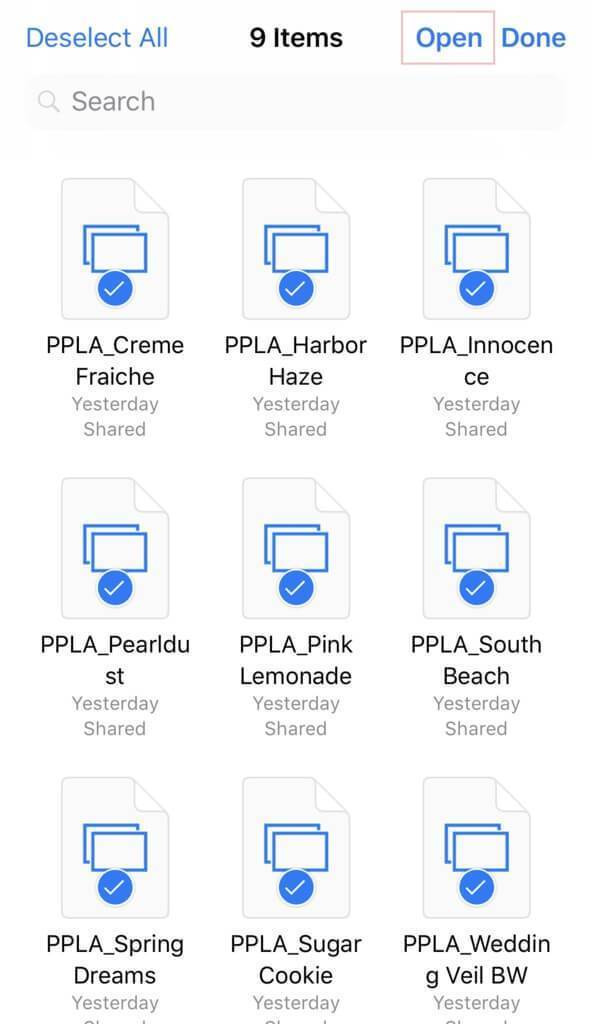
NOTE: Preset files are DNG files. When you initially open the image, you may get an error that says, «Cannot Load File». This is normal. Press the check mark in the corner anyway.
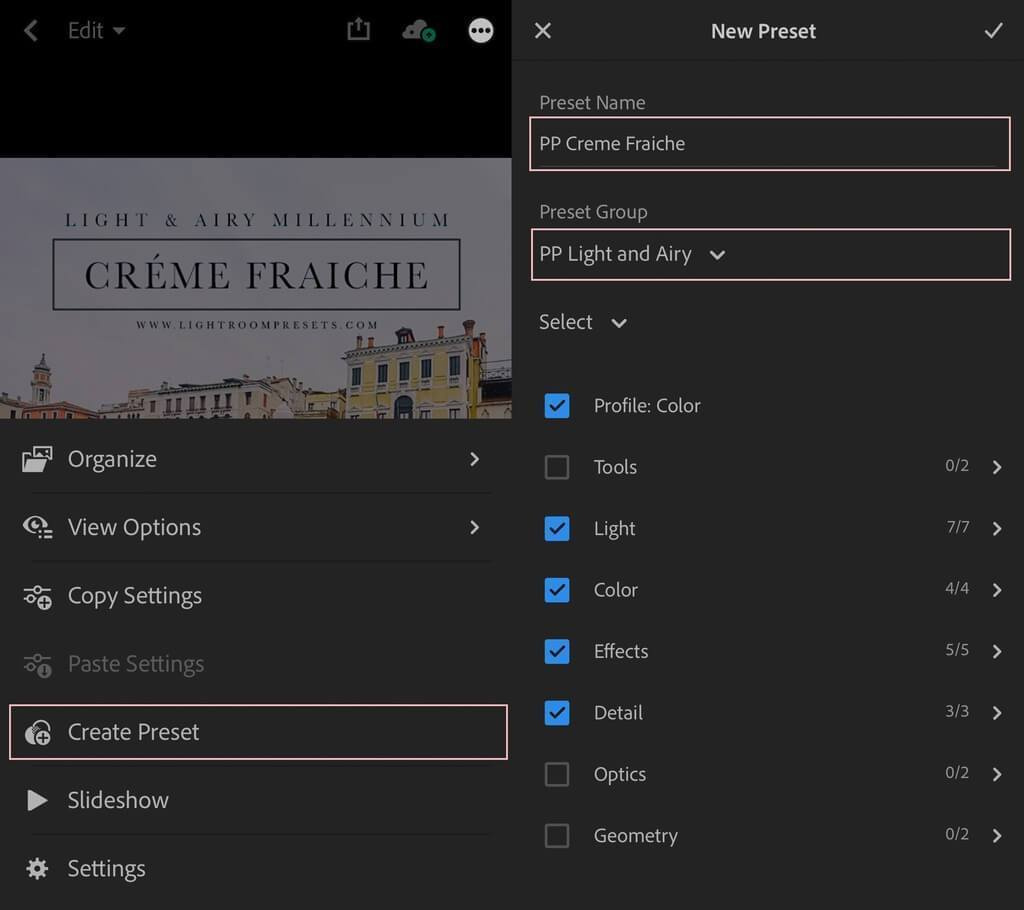
Step 4: Create Lightroom Presets from the DNG Files.
Click on one of the newly imported files, then click on the three dots inside a circle in the upper right-hand corner of the screen. From there, choose «Create Preset» from the menu that appears.
Give your preset a name. We recommend to type the same name that is on the front of the preset image (to keep things simple).
You should also put the preset in a Preset Group. By default, it will be in the User Presets group. Creating a new group with your new collection’s name will keep the presets from each collection together.
Do these same steps for each DNG/preset file.
Step 5: Using Your New Presets.
Select an image in the Lightroom Mobile App that you would like to edit. Swipe left on the bottom options until you see «Presets» and tap on that option. It will open with your most recently used preset collection. By tapping on the collection name, you can choose the new collection you just installed.
Click through the presets until you find the one you like. When you are finished adding your preset, click the check mark in the lower right corner.